Learn more about airtightness
Participate in an Academy!
Sign up hereThis builder is building his forever home for him & his family. Check out how he's getting on and how he's making it airtight.
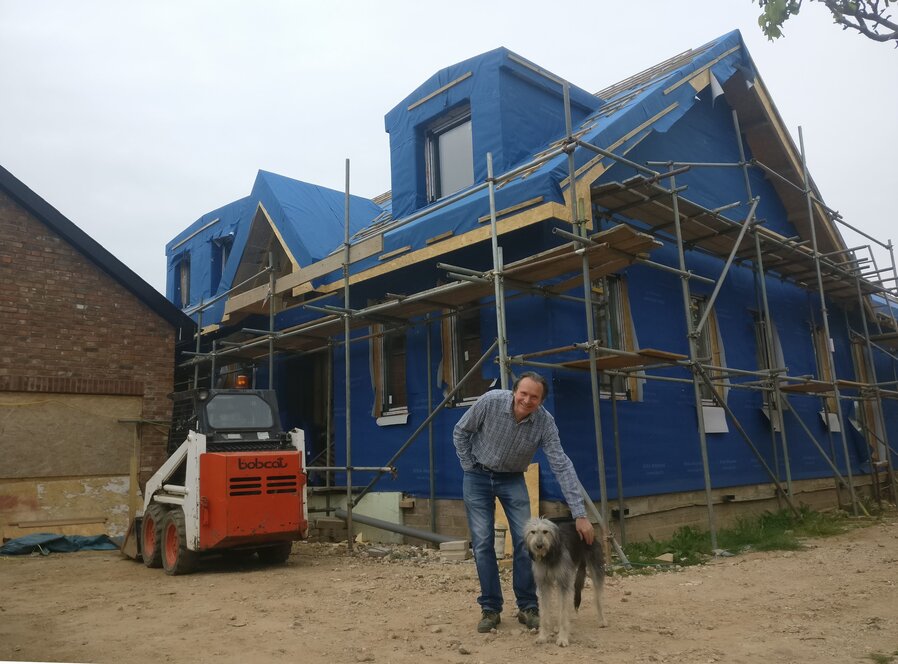
Peter and Echo, his Lurcher, on site
On an island off an island in the North sea, Peter Milburn is building a house for his family. This experienced builder is building a high quality, comfortable and airtight home into which to retire. But, is this the last low energy house before brexit?
Peter’s long career in the trade started with time in Canada working with timber construction. Since returning to the UK he’s spent 39 years as a carpenter & builder of timber homes – always with an eye on sustainable construction. Fast forward to 2018 when he commenced this scheme. He is aiming to demonstrate that it is possible to self-build an affordable home with near-Passivhaus levels of efficiency. That would certainly get our vote.
The house features an unusual semi-enclosed swimming pool that is, like the UK at the time of writing, both inside and outside.
He wanted a bespoke modern home that didn’t reply on extensive use of high skilled labour or specialist machinery. So, he has opted for a timber frame. The house will also be demountable at end-of-life. Peter has an admirable distaste for expanding foam, not least because it sticks like the proverbial, which can make recycling of materials very difficult.
So, how has this experienced practitioner chosen to procure the materials for this very personal project? He has leveraged the proximity of Europe by going on a continental shopping trip. Peter visited Poland to meet directly with his suppliers. He filled up a container with insulation, windows, doors and sundry. His research had identified easy-to-assemble components that perform well. By dealing directly he was able to save thousands of Euros.
So here is an English builder using Polish components to build an airtight German-inspired home. The delivery date for the materials was the eve of the first Brexit deadline this summer. Who knows how much of this will be so accessible in the years to come?
When it comes to airtightness and vapour control however, Peter has opted for high-quality SIGA products. He sourced these directly from the webshop.
But achieving airtightness takes much more than a few mouse clicks. For example, the condensation control in the timber frame required specialist advice and dynamic moisture modellingwhich was provided gratis by SIGA. These are experts that Michael Gove would not be tired of.
So, why did this cost-conscious purchaser elect for SIGA over a cheaper product?
“It was simply a matter of quality”, Peter told us.
“In my experience SIGA have a higher quality product that is easier to install. What’s more, the technical, training and sales support is superior.”
A bonus is the installation manual is graphical rather than heavy with text. It is easy to follow, even by Peter’s site staff who may have struggled to follow technical English-language instruction. SIGA reps were on hand for site training if required.
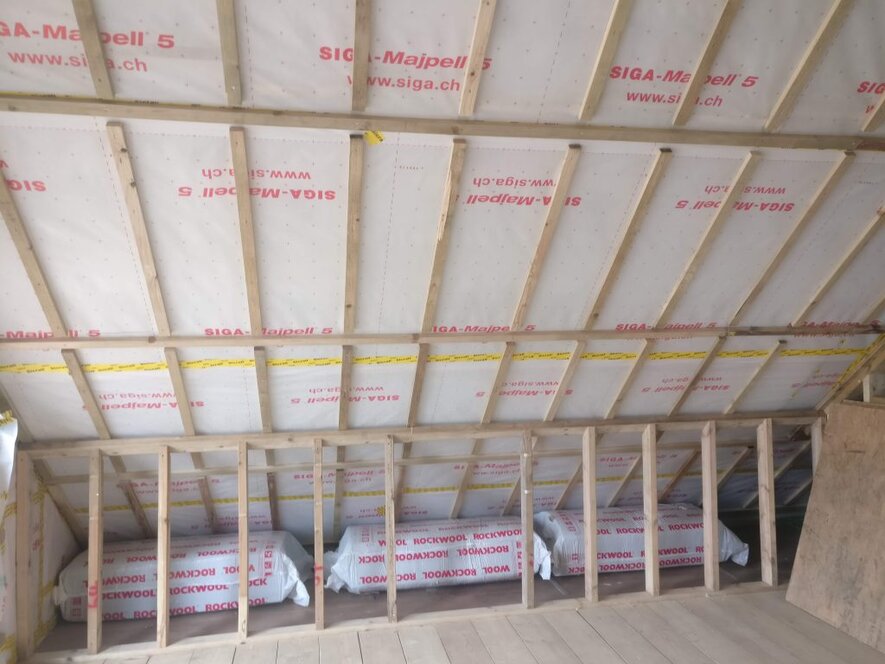
Can you spot the hole in the air & vapour control layer (AVCL) that can be seen in this photograph? The answer is below…
Nudura made the basement and swimming pool walls. Nudura is an insulated concrete formwork product. The ground floor is vented beam & block topped with insulation and a poured screed. This has a polished finish and contains underfloor heating. A ground source heat pump will generate heat. This is connected to a horizontal slinky style array in the rear garden. They saved £30,000 by avoiding the need for a gas connection along the private lane; quite a dividend.
The external walls are timber frame with SIGA Majpell® 5 as the vapour control & airtightness layer. As well as the SIGA manual, Peter referred to the TRADA design guide.
In the walls, 150mm rockwool sits between the solid studs, onto which OSB sheathing boards sit. SIGA Majvest® is the windproof & weathering layer. Adhered to this is a further 150mm of XPS insulation, finally finished in white acrylic render.
Peter is aiming for “Passivhaus levels of efficiency”, although he is not using the Passivhaus calculation method or testing regimes. In his words, he has designed out thermal bridging ‘as far as possible’, although he is not calculating the heat loss. For instance, the design for a large steel beam penetrated most of the way through the external wall insulation. Peter instructed the structural engineer to redesign it, so now the external insulation completely wraps the steelwork. More on this approach below.
The AVCL layer in the floor is the DPM. He lapped these into the wall membrane SIGA Majpell® 5; itself taped with the yellow adhesive tape, SIGA Sicrall 60. Where the intermediate frame meets the wall is always a risk for leakage. Peter was careful to insert a lap of membrane around the floor, to allow the VC layer to continue unbroken from ground floor to first.
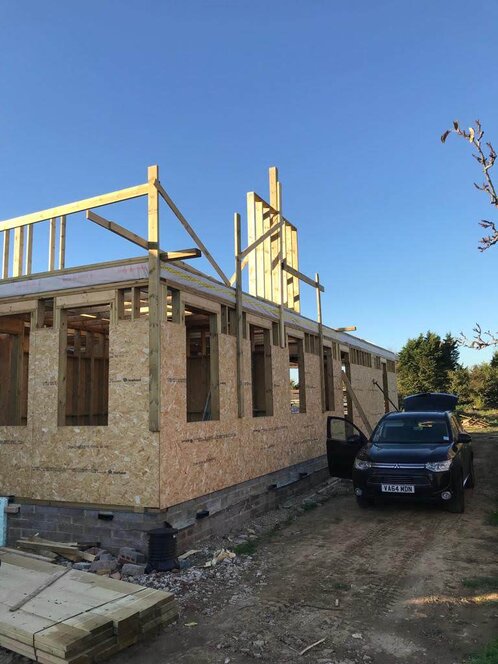
First floor framing installed, with a lap of membrane already installed; to facilitate a continuous barrier through the wall-floor junction
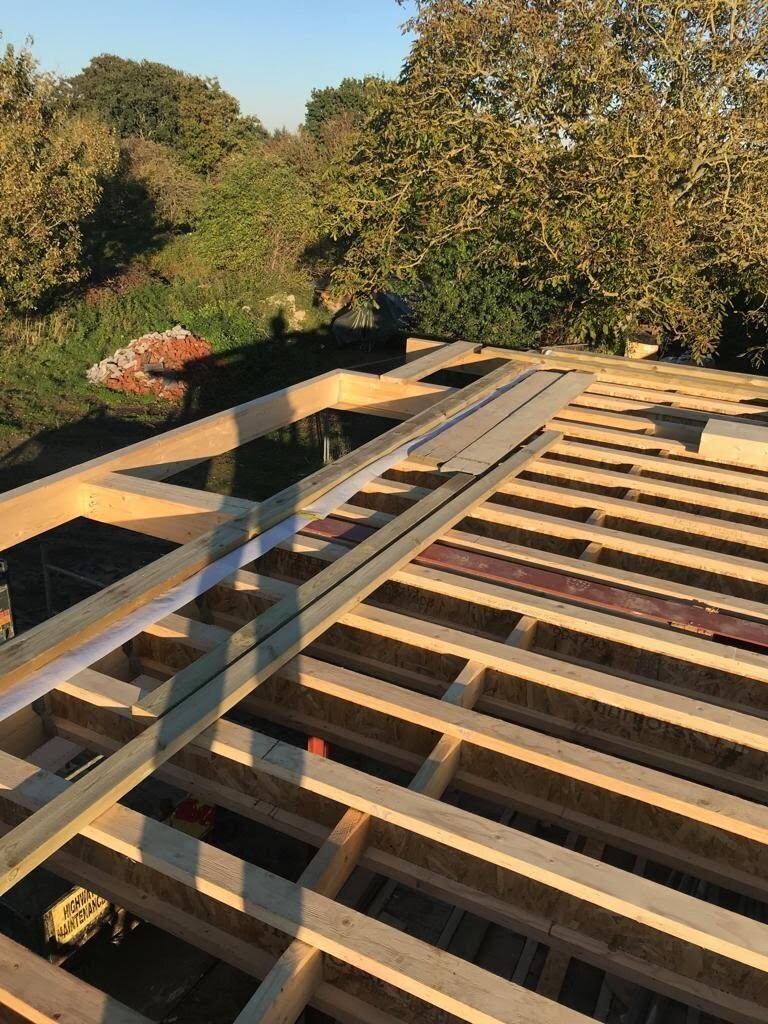
The roof build up is plasterboard, battens, SIGA Majpell® 5 vapour control/air tightness layer, 150mm PIR Quinn Therm between timber joists, OSB, Foiled bitumen, followed by a further 150mm PIR Quinn Therm adhered; 2no OSB* then Majcoat® as the waterproof breathable sarking membrane, battens to create a void, and finally an unvented standing seam zinc roof.
*The Zinc requires at least 22mm fixing depth.
This is a pitched roof, with two ridges forming a T-shape in plan. The membrane is glued & taped to the roof ridge. This has created some difficult 3D junctions that Peter has had to deal with.
So, once the layer has been installed, how does Peter stop it getting damaged?
“All the guys on site are well-inducted in the importance of the AVCL layer. If we spot a leak we either fix it straight away, or highlight it with a felt-tip pen and come back to it later.”
We asked Peter; given that you are aiming for Passivhaus levels of efficiency, what is your air permeability target? “Zero” was his reply.
Of course it is. Aim for zero, and the tolerance becomes your acceptable leakage rate. An AVCL layer is already required for this type of construction (and a base level of airtightness is required on all new buildings). So, the cost of doing a proper job of it doesn’t have to be significant, and represents serious value for money.
So, how does the design ensure continuity of the air tightness layer? Well, this must be carefully drawn on a section drawing with a red line that cannot be crossed (just don’t ask Teresa May about that).
The first air tightness pressure test will happen as soon as the windows are in. Peter will run the test and use a smoke gun to identify leaks. He is hoping to delay any internal lining work until this test is complete, to ensure visibility of the AVCL for this critical test.
A final test will take place before completion. We will post updates on the results in the comments below.
Peter has the know-how to do most of the design himself, including managing the change control procedure. We couldn’t help but wonder what would be done differently if he had followed the Passivhaus design and testing process? We suspect that a thermal bridge would have been identified at the wall-floor junction, and that more insulation would be included in the ground floor than the ~100mm currently allowed. Perhaps he would have an alternative solution to putting rigid Quinn Therm between studs. Conversely, perhaps the thickness of insulation in the walls could be reduced without significant impact.
This project is intended as a model for affordable high-quality low impact self-build. This project is reliant on having Peter on site everyday as a quality control manager. Although most self-builders may not have the depth of experience that Peter does, perhaps they can pick up a few tips from this scheme. We’d certainly recommend getting support from a friendly Passivhaus consultant or designer as early as possible. SIGA can provide advice on airtightness, of course.
This project is highly ambitious in its aims. It is the product of Peter’s long experience, and of a freely-trading Europe. We look forward with hope to a good outcome.
PS: If you are interested in other best practice examples of Eco houses in the UK, you may find Grand Designs: The Street, episode 1, a valuable watch. It shows another experienced self-builder determined to do as much as possible himself.
PPS: Below is the answer to Spot the Leak: A batten had been removed and not replaced- not all the screw holes have been taped over.
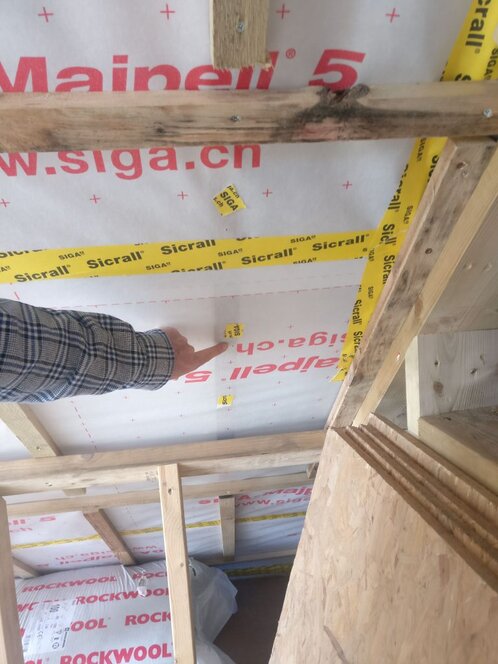
A batten had been removed and not replaced – not all the screw holes have been taped over.
Bertie has practised building services engineering and sustainability consulting in the UK for 15 years. He is a certified PassivHaus planner. He is on a mission to help you deliver a high-quality building, one that does what it says on the tin.
Added to my cart