How to air seal exterior wire penetrations
How to make sure wire penetrations aren’t letting in water and letting air travel at highway speeds in and out of your building.
My last apartment was built in the 1970s.
And back then Texture 1-11, or “T-111,” was all the rage back then and it covered the entire building.
When my building got re-wired for cable internet, the cable guy was nice enough to run the coax around the outside of the house and punch holes directly through the T-111 and the interior drywall. These leak air like a sieve.
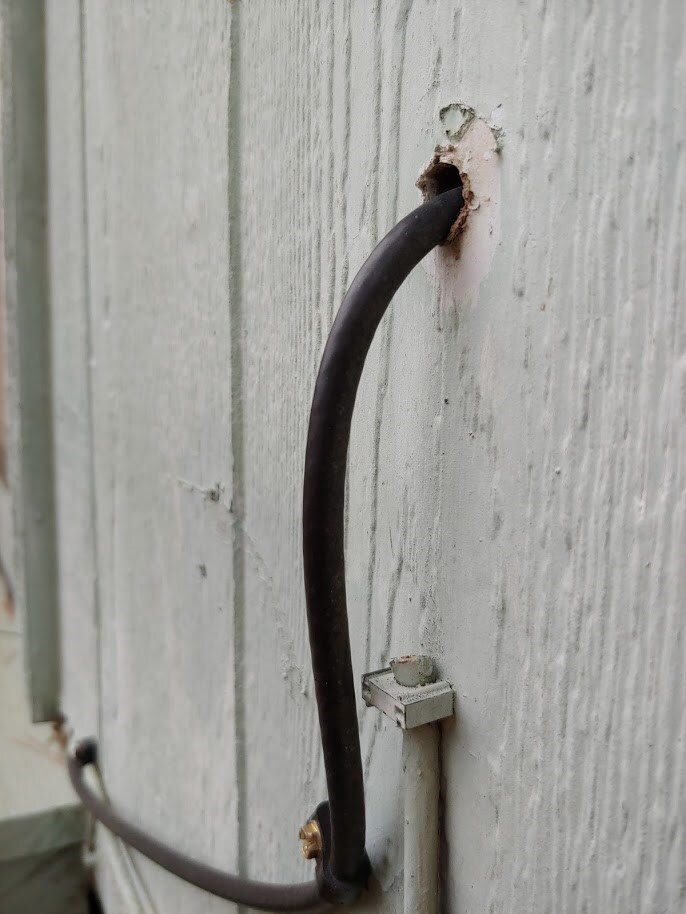
The same thing happens to your weather-resistant barrier (WRB) when your electrician comes through to rough-in the wiring.
Romex and conduit need to go where they need to go. Electricians aren’t paid to detail your WRB. Same thing with your cable guy, siding, etc.
As a builder, you care about moisture intrusion and increasingly must anticipate testing your work for airtightness.
Remember a few best practices for whole-building air sealing:
- Capture all the easy targets: they cost you less $$ than the mystery leaks
- Every detail adds up
- Add redundancy when possible: human error during installation is a mathematical given
Wire penetrations are one of those obvious details that you can easily tackle.
There are a handful of methods that can create a continuous seal (with varying effectiveness) between the WRB and the wire itself.
- Smear caulk or silicon around it
- Poke a hole in a swatch of tape and slide it over the wire
- Envelop the wire with tape, create a fully sealed drip edge, and integrate a weep loop
Let’s go with Door Number 3, Monty.

All we need is about 6” total of good quality weather-sealing tape or flashing. Key here is to use something with a healthy amount of glue on it (we’re using Fentrim® IS 2) and a little stretch.
Step 1: Surround the wire penetration
Take a 2” long piece of material and fold it into an “L” shape. Stick it horizontally below the wire to the WRB, and then to the wire.
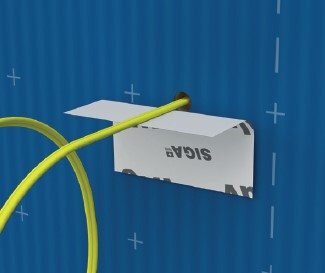
Do the same thing with a 3” long piece on top of the wire, sticking the two pieces of tape together in a flat fin around the wire. This is where a good tape like Fentrim® is important: it’s repositionable until you really press on firmly. Using a longer piece on top ensures you’ll be very unlikely to create a reverse lap.
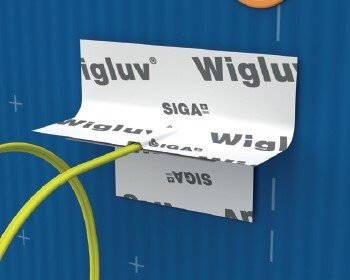
Remember that you don't want to air seal multiple wire penetrations together. For better results, make sure to seal each penetration individually.
Not this ↓
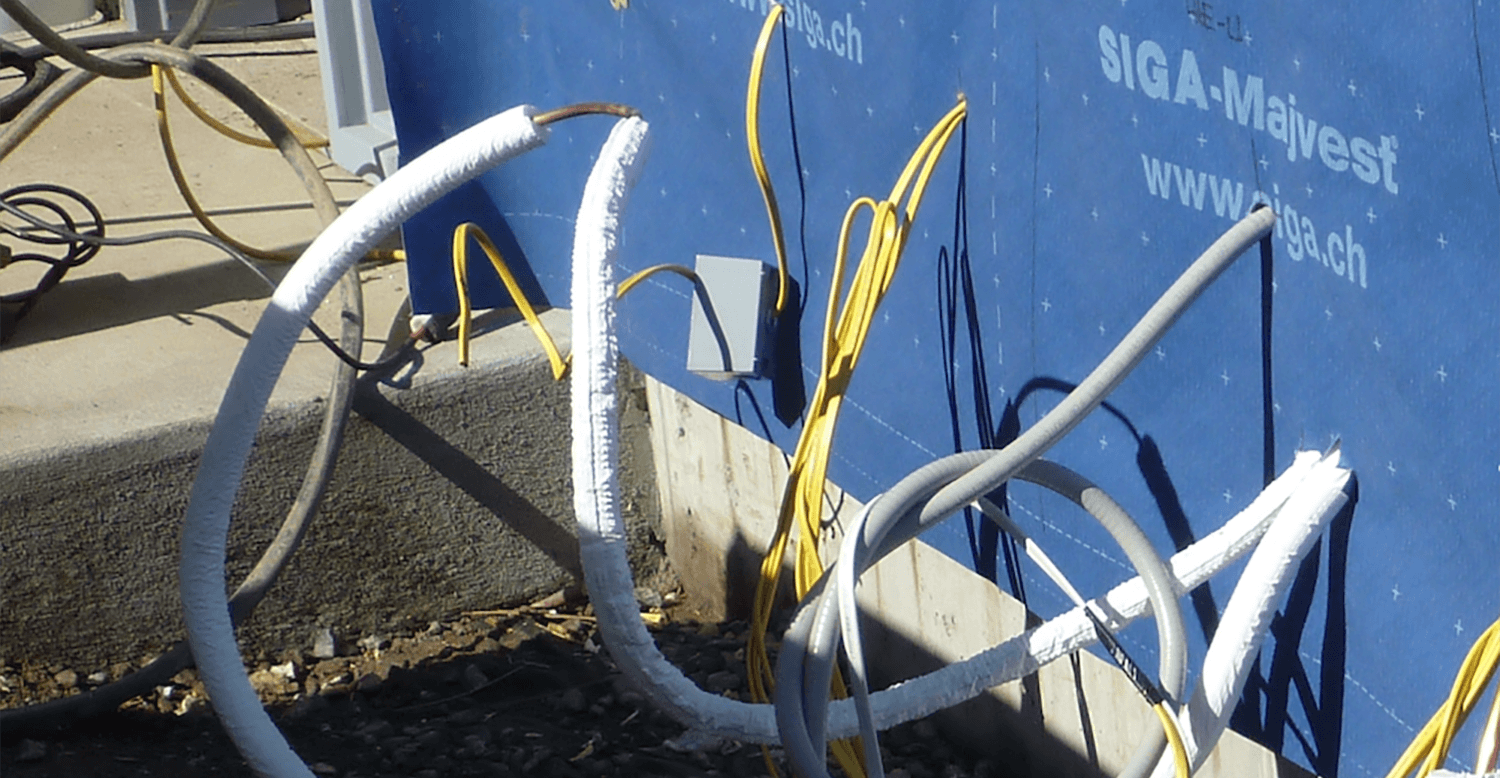
Yes this ↓
Step 2: Create a drip edge
Fold each sticky end of the fin onto itself at a 45 degree angle.
Press the entire fin, including the wire downwards parallel with the wall. This will divert any bulk water down past the point of entry into the wall.
Step 3: Weep it good
If you are building a perfect wall, your wall assembly is designed with an airspace behind the cladding (rainscreen). Create a ‘weep loop’ in the pigtail.
This is a low spot in the wire between the electrical fixture and the wall penetration. Any water that happens to run down the face of the WRB will find its way to this point instead of inside the fixture (or vice versa).
If your cladding is mounted without an airspace, the wire must travel directly to the fixture or the junction box is mounted directly over the penetration.
In this case, the fin can be trimmed by the electrician to accommodate proper clamping. Even if the junction box is weather sealed, you’ve still added reliable air-sealing redundancy.
Well done!
You should now have your exterior wire penetration successfully sealed, protecting against air and water damage.
Get more air sealing tips like this one delivered right to your email by subscribing to our monthly Build It Better eNewsletter!
Jessica Kumor
Jessica is SIGA North America's Marketing Director. It's her job to deliver you the latest research and practical tips for building air and weathertight buildings. When she's not interviewing customers and posting about building science you can find her refinishing furniture.